Fox Tails
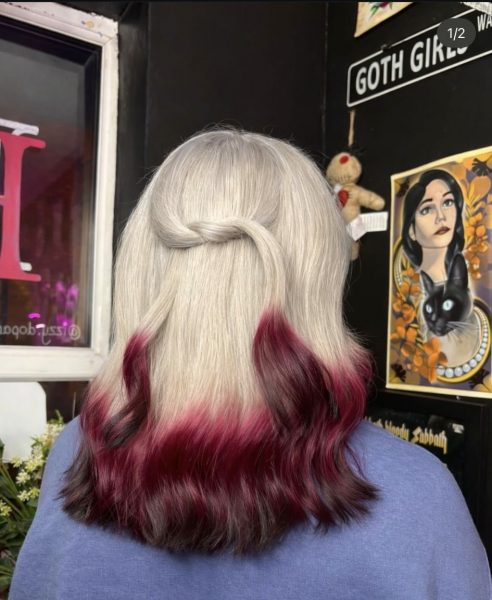
This trend is all about bold contrast with a wearable edge, and the placement is key to making it feel intentional rather than harsh. Start with a root application of lightener to refresh any existing pre-lightened hair, focusing on lifting evenly while maintaining the integrity of the mid-lengths and ends. Once you’ve achieved a clean lift, tone through the blonde to create a neutral or slightly warm base depending on your desired end result.
The signature “fox tail” effect comes from the contrast in the ends. Apply a black tint as a dip-dye, concentrating on the very tips and slightly feathering upwards to avoid a harsh line. Once developed and rinsed, go back in with your creative tone, apply this slightly above the black, allowing the two shades to softly blur into each other for a more seamless transition.
For a softer, more commercial take, I love a full head copper over a lighter base. Melt a deeper tone, such as black or a deep brunette, through the ends to echo the fox tail aesthetic. This version is ideal for clients who want to tap into the trend while keeping it salon-friendly. Pairing this with natural texture or soft waves enhances the blend and gives a more lived-in, alternative finish.
Shine Lines
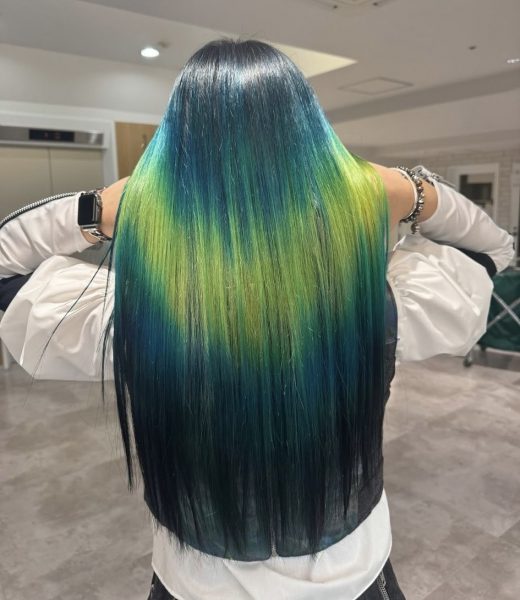
Shine lines are a highly visual, placement-driven colour that rely on both precision and saturation. Begin with a clean canvas, pre-lightened hair lifted to a level 9 or 10 is essential to ensure vibrancy. Keeping depth underneath is important, so avoid over-lightening the lower sections and maintain a natural or slightly shadowed root for contrast.
Section out the halo area where the “shine” will sit, this is where the light naturally hits the hair. Working with diagonal colour sections, paint on your chosen tones (I used dark blue, teal, acid green) exactly where you want the reflective line to appear. This isn’t a traditional blend-first technique, instead, focus on placement and full saturation. The more pigment you deposit, the easier it is to manipulate and diffuse the colours together afterwards without losing intensity.
Once placed, gently blend where the colours meet to avoid striping, but be careful not to overwork the hair. The goal is a fluid transition that still maintains that striking, light-reflective band.
Mermaid Ombré
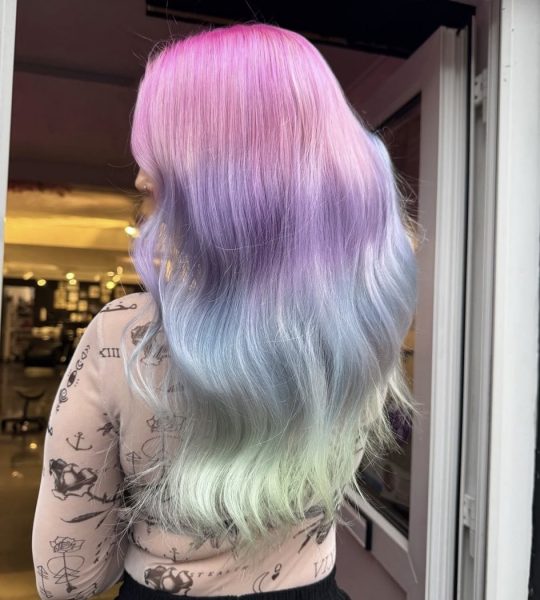
This look is all about softness, clarity of tone and a seamless gradient but achieving that requires a prepped base. Lift the hair to a clean level 10, ensuring even lift throughout. Any residual warmth will distort pastel tones, so pre-toning with a violet or blue-based “white” toner is essential to neutralise yellow and create a true blank canvas.
Work in clean, controlled sections starting from the nape and moving upwards. Apply your pastel shades in a melt technique, keeping each colour distinct enough to be visible while still flowing into the next. Again, the key here is saturation, pastels can be deceptive, and under-saturation will result in patchiness or uneven fade-out.
Be mindful with your blending, unlike bolder colours, pastels can lose their identity very quickly if overworked, so use a light hand when merging shades, ensuring you maintain control. Allow each section to process fully before disturbing, ensuring maximum longevity and truest colour payoff. Ideal for clients who love soft, feminine, fantasy tones and blondes looking to experiment with creative colour.