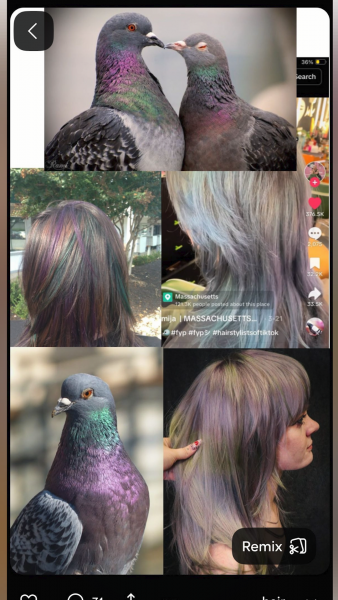
The idea of pigeons as hair inspo was not on our bingo card for 2026.
For Warren Edwards, Creative Director and Co-Owner, Warren & The Hare ‘Pigeon Hair’ isn’t just a hair colour, it’s been a creative challenge. Warren shares with us how he brought the look to life.
View this post on Instagram
How “Pigeon Hair” Came to Life
I first met Sophie after she was referred to us by her original salon. She’d been asking for “pigeon hair” for a while, but they weren’t confident in achieving the colour placement, so they sent her our way.
She booked a consultation with my colleague Zara, who was understandably a little unsure. I was nearby and overheard the conversation, what caught my attention straight away was Sophie showing pictures of pigeons. I loved it. Instantly. I knew I wanted to take it on.
Even though my diary was closed, I stepped in and offered to do it. We sat together, went through her moodboard (full of pigeons), and I just got it. I understood exactly what she was trying to achieve and was determined to bring it to life.
The Colour Journey
The first appointment was more of a colour correction. I needed to lift the existing colour through the ends. But the final look you’re seeing (see Reel above) was actually created during the second appointment, where I felt more confident refining the result.
To pre-lighten, I used Crazy Color High Lift Ultraviolet Lightener with 20 vol, applied as a scalp bleach and processed for 25 minutes. Instead of traditional toning, I used a silver shampoo to gently refine the base without over-neutralising, it was important to leave room for the creative colours to do their job.
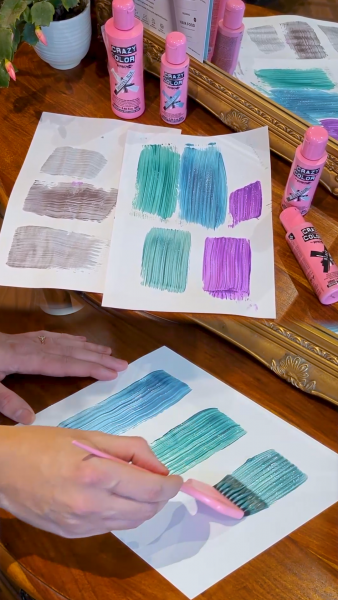
Creating the Pigeon Tones
I created three bespoke shades using Crazy Color:
- Grey: Slate + Silver (50/50) with a small amount of Black for depth
- Purple: Hot Purple + Lavender (50/50)
- Green: Pine Green + Silver (50/50) for a softer, more iridescent finish
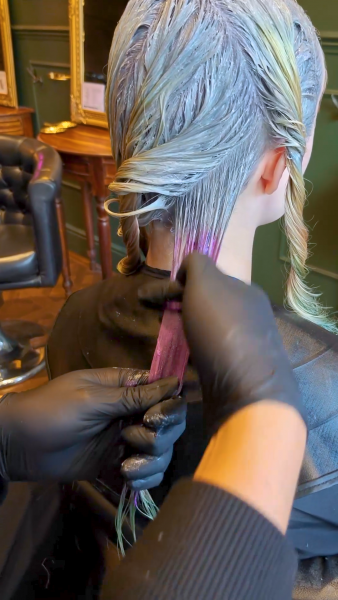
Application Technique
On towel-dried hair, I sectioned using a classic “hot cross bun” pattern.
- Applied grey at the roots, extending a couple of inches down
- Worked in diagonal-back sections through the head
- Alternated between grey, purple and green
- Varied placement and lengths in each section to avoid uniformity
- Melted and smudged colours together for a soft, blurred finish
For example, one section might be grey at the root, purple through the mid-lengths, green through the ends, finishing again with grey. The next section would be completely different.
The fringe was kept mostly grey, with purple on the tips to frame the face.
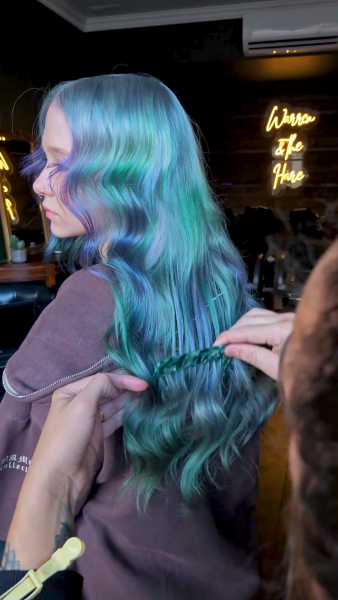
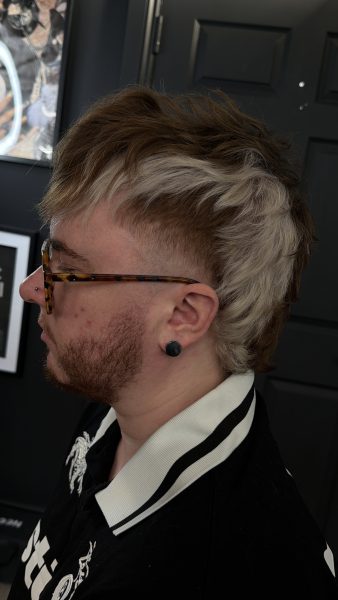
The Finish
The key to this look was imperfection and fluidity. I didn’t aim for neatness—blending was everything. The way the purple and green melt together creates an almost third tone, giving that iridescent, “pigeon” effect without harsh lines.
Because Crazy Color is a conditioning, semi-permanent stain, it also gives flexibility for future changes – whether going bolder or softer next time.